2024. 6. 28. 13:53ㆍ문제해결
문제 상황
ngrinder/controller와 ngrinder/agent를 docker 컨테이너를 이용하여 실행한 상태에서 기본적인 로그인 성능 테스트를 하기 위해서 groovy 언어 기반 스크립트를 다음과 같이 작성하였습니다.
import static net.grinder.script.Grinder.grinder
import static org.junit.Assert.*
import static org.hamcrest.Matchers.*
import net.grinder.script.GTest
import net.grinder.script.Grinder
import net.grinder.scriptengine.groovy.junit.GrinderRunner
import net.grinder.scriptengine.groovy.junit.annotation.BeforeProcess
import net.grinder.scriptengine.groovy.junit.annotation.BeforeThread
// import static net.grinder.util.GrinderUtils.* // You can use this if you're using nGrinder after 3.2.3
import org.junit.Before
import org.junit.BeforeClass
import org.junit.Test
import org.junit.runner.RunWith

import org.ngrinder.http.HTTPRequest
import org.ngrinder.http.HTTPRequestControl
import org.ngrinder.http.HTTPResponse
import org.ngrinder.http.cookie.Cookie
import org.ngrinder.http.cookie.CookieManager

/**
* A simple example using the HTTP plugin that shows the retrieval of a single page via HTTP.
*
* This script is automatically generated by ngrinder.
*
* @author admin
*/
@RunWith(GrinderRunner)
class TestRunner {

	public static GTest test
	public static HTTPRequest request
	public static Map<String, String> headers = [:]
	public static String body = "{\n    \"email\": \"dragonbead95@naver.com\",\n    \"password\": \"nemo1234@\"\n}"
	public static List<Cookie> cookies = []

	@BeforeProcess
	public static void beforeProcess() {
		HTTPRequestControl.setConnectionTimeout(300000)
		test = new GTest(1, "127.0.0.1")
		request = new HTTPRequest()

		// Set header data
		headers.put("Content-Type", "application/json")
		grinder.logger.info("before process.")
	}

	@BeforeThread
	public void beforeThread() {
		test.record(this, "test")
		grinder.statistics.delayReports = true
		grinder.logger.info("before thread.")
	}

	@Before
	public void before() {
		request.setHeaders(headers)
		CookieManager.addCookies(cookies)
		grinder.logger.info("before. init headers and cookies")
	}

	@Test
	public void test() {
		HTTPResponse response = request.POST("http://127.0.0.1/api/auth/login", body.getBytes())

		if (response.statusCode == 301 || response.statusCode == 302) {
			grinder.logger.warn("Warning. The response may not be correct. The response code was {}.", response.statusCode)
		} else {
			assertThat(response.statusCode, is(200))
		}
	}
}
위 스크립트를 기반으로 검증을 수행한 결과는 다음과 같았습니다.
2024-06-28 04:09:23,875 INFO  Setting of nGrinder local DNS successfully
2024-06-28 04:09:23,901 INFO  The Grinder version 3.9.1
2024-06-28 04:09:23,911 INFO  OpenJDK Runtime Environment 11.0.22+7-LTS: OpenJDK 64-Bit Server VM (11.0.22+7-LTS, mixed mode) on Linux amd64 5.15.49-linuxkit-pr
2024-06-28 04:09:23,964 INFO  time zone is UTC (+0000)
2024-06-28 04:09:24,298 INFO  worker process 0 of agent number 0
2024-06-28 04:09:24,396 INFO  Instrumentation agents: byte code transforming instrumenter for Java
2024-06-28 04:09:35,106 INFO  registered plug-in net.grinder.plugin.http.HTTPPlugin
2024-06-28 04:09:35,429 INFO  before process.
2024-06-28 04:09:35,437 INFO  Running "login.groovy" using GroovyScriptEngine running with groovy version: 3.0.5
2024-06-28 04:09:35,986 INFO  before thread.
2024-06-28 04:09:35,990 INFO  starting, will do 1 run
2024-06-28 04:09:35,992 INFO  Start time is 1719547775992 ms since Epoch
2024-06-28 04:09:36,176 INFO  before. init headers and cookies
2024-06-28 04:09:36,389 ERROR java.util.concurrent.ExecutionException: java.net.ConnectException: Connection refused
java.net.ConnectException: Connection refused
	at org.apache.hc.core5.reactor.InternalConnectChannel.onIOEvent(InternalConnectChannel.java:64)
	at org.apache.hc.core5.reactor.InternalChannel.handleIOEvent(InternalChannel.java:51)
	at org.apache.hc.core5.reactor.SingleCoreIOReactor.processEvents(SingleCoreIOReactor.java:179)
	at org.apache.hc.core5.reactor.SingleCoreIOReactor.doExecute(SingleCoreIOReactor.java:128)
	at org.apache.hc.core5.reactor.AbstractSingleCoreIOReactor.execute(AbstractSingleCoreIOReactor.java:85)
	at org.apache.hc.core5.reactor.IOReactorWorker.run(IOReactorWorker.java:44)
위와 같은 ConnectionException이 발생한 이유는 agent 머신이 "http://127.0.0.1:8080" 서버에 연결할 수 없기 때문입니다.
원인
사용자가 동일한 로컬 머신에서 실행하더라도 ngrinder 아키텍처상 agent, controller, target(애플리케이션 서버)는 서로 다른 가상의 머신에서 실행됩니다. 그래서 agent에서 localhost 또는 "127.0.0.1"을 이용하면 target이나 controller이 아닌 agent 자신을 가리키는 것이 됩니다.
위 설명에서 controller, agent, target의 설명은 다음과 같습니다.
- controller : 사용자로부터 테스트 요청을 받고 테스트를 관리할 하나의 콘솔과 여러개의 agent를 하나로 묶어서 테스트를 수행합니다.
- agent : controller의 요청을 받아서 실질적으로 테스트를 수행하는 머신
- target : 사용자가 테스트를 하고 싶어하는 서버
해결 방법
이 문제를 해결하기 위해서 ngrok 프로세스를 이용하여 터널링을 수행합니다. 터널링 기술은 데이터 스트림을 인터넷 상에서 가상의 파이프를 통해 전달되는 기술입니다.
ngrok 프로세스 설치 환경은 Mac OS입니다. 만약 다른 운영체제라면 다음 링크를 확인해주시면 감사하겠습니다.
https://ngrok.com/docs/getting-started/?os=macos
Quickstart | ngrok documentation
This quickstart will use the ngrok agent to put your application on
ngrok.com
1. ngrok 프로세스 설치
brew install ngrok/ngrok/ngrok
2. ngrok 인증 토큰 추가
ngrok 프로세스를 설치한 다음에 여러분들의 ngrok agent를 ngrok 계정에 연결합니다. 만약 아직 ngrok 계정이 없다면 회원가입을 해야 합니다. 회원가입을 하여 ngrok 계정에 로그인 한 다음에 대시보드 페이지에서 ngrok authtoken을 복사합니다. 그리고 다음과 같은 명령어를 수행합니다. <TOKEN> 부분에 복사한 ngrok authtoken을 붙여넣습니다.
ngrok config add-authtoken <TOKEN>
3. ngrok 도메인 추가
단순한 방법으로 "http://localhost:8080" 주소에 대한 터널링을 하게 되면 랜덤한 이름으로 포워딩 주소를 받게 됩니다. 이러한 문제를 해결하기 위해서 ngrok 사이트에서 도메인을 생성하여 고정하도록 합니다.
https://dashboard.ngrok.com/cloud-edge/domains
ngrok - Online in One Line
dashboard.ngrok.com
위 링크로 들어가서 도메인을 생성합니다.

도메인을 생성하게 되면 다음과 같은 화면이 출력됩니다.
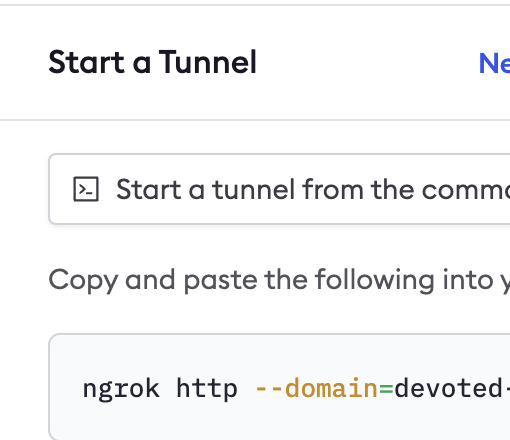
위에서 생성한 도메인을 기반으로 터널링을 수행합니다.
ngrok http 8080 --domain=<DOMAIN>
4. app 보호하기
You may not want everyone to be able to access your application. ngrok can quickly add authentication to your app without any changes. If your Google account is alan@example.com, you can restrict access only for yourself by running ngrok with:
ngrok http 8080 --domain=<DOMAIN> --oauth=google --oauth-allow-email=alan@example.com
5. ngrinder script 수정
다음과 같이 3단계에서 설정한 도메인 주소로 스크립트를 수정합니다.

6. 실행 결과 확인
ngrinder 스크립트의 Validate 버튼을 클릭하여 테스트를 수행합니다. 실행 결과 테스트에 성공한 것을 볼수 있습니다.

References
- https://goto-pangyo.tistory.com/278
- https://goto-pangyo.tistory.com/277
- https://ngrok.com/docs/getting-started/
'문제해결' 카테고리의 다른 글
| 이벤트 리스너 메서드에서 삭제된 매입 이력이 조회되는 문제 해결 (0) | 2024.08.18 |
|---|---|
| junit으로 작성한 테스트가 gradle로 실행될때 해결 (0) | 2023.03.26 |
| JDK18 한글 인코딩 문제 (0) | 2023.02.06 |
| [docker] mysql conatiner 생성시 포트포워딩 문제 (0) | 2022.12.21 |
| [SpringBoot] SpringBoot H2 데이터베이스 설정 (0) | 2022.11.21 |